Thursday, December 29, 2011

Date-Filled Cookies, Page 121, 2nd Column, 1st Recipe

This week’s recipe is yet another I would not have picked out, Date-Filled Cookies!  I’ve had dates before, but never gone out of my way for them.  So this cookie never really appealed, but this is an adventure and I’d never made filled cookies before, so time to try!


This Filled Cookies I recipe from All Recipes matches the Better Homes and Gardens on almost exactly for the ingredients.  There is a mistake in the recipe, 1 egg is listed twice.  It should only be there once for the dough, not the filling.  Down to the Vanilla Extract are the ingredients for the cookie, below that is for the filling (excluding the egg).  The instructions are a little different too, but overall it's close enough.

First check is to see out of my 6 cook book editions when this shows up and how it has changed.  It looks like the first appearance is my 1976 cook book. It shows up in the two following cook books as well, but in the second following one it is an alternate to the Date Pinwheels which made me look back through all the books for that.  As it turns out the Date Pinwheels are the same thing, just assembled differently.  A sugar cookie dough with a date filling rolled up and sliced instead.  So when I looked again, Date Pinwheels went back to the 1953 edition.  So basically Date-Filled Cookies or Date Pinwheels were in every edition except the 1936 one.

The recipe varied slightly in the date filling (older recipes adding nuts to it as well.) And the cookie varied slightly as well, but it was pretty much a sugar cookie dough and date filling made with dates, sugar and water.  It must have been a well liked recipe to keep making an appearance.

Since the sugar cookies would be rolled out I decided it was time to try Rolling Pin Rings to keep the thickness consistent.  I’ll talk about these more later.  Dates would be nearly the only ingredient I’d need to get (and a lemon as well.)  So easy to buy for.  The only down side is that the packages of dates I got give you 1 ¾ cup of dates when the recipe calls for 2.  So I’ve got some spare now.

The dough was a standard rolled sugar cookie dough, cream shortening, sugar, add other wet ingredients, then the dry ones, so I prepared that first and then put it in the refrigerator to chill for later and then started in on the filling.


Dates in the sauce pan with water and
sugar before cooking.
I had assumed that the filling would have the fruit, some thickener, etc. But it turned out to be quite simple.  The cut up dates, a little sugar, water, bring to a simmer and cook for 5 minutes.  Tah dah!  Date filling.  After cooling it’s like thick preserves, perfect for a filling.  Really neat.  


Date filling after cooking
5 minutes.
So I let everything cool in the refrigerator until the next day.  Next step was to roll out the sugar cookie dough to 1/8 of an inch.  This was where the rolling pin rings would come in.  The recipe recommended taking half the dough at a time to roll out.  This probably works if you’re not using the rings to keep a consistent thickness.


With the rings I could press down and not worry about making the dough too thin, but I also was very restricted on how wide the dough could get.  It had to fit between the two rings at each end of the rolling pin.  You’d have the same problem with another solution, strips of a specific thickness on either side of the dough, but at least you could use a wider rolling pin.


Circles cut into the dough.
So I actually rolled out about ¼ of the dough at a time.  Even so, I still had to roll it long and narrow to fit between the rolling pin rings.  I used a 2.5 inch circular cutter with a decorative edge and then a pastry scraper to carefully pick up each cookie.  Even if the cookies were kind of stuck to the surface a bit, just jiggling the scraper under them lifted them off very cleanly.  I placed my usual number of cookie bottoms on the sheet (rows of 4, 3, 4, 3, and 4, so 18 cookies to a sheet) 

Bottoms on the cookie sheet.
The recipe then called for using a teaspoon of filling.  Now it gets confusing, do they mean a measuring teaspoon or an eating teaspoon?  I chose to use a measuring teaspoon very slightly heaped to measure out the filling.


Slightly heaping teaspoon of filling on the cookies.
Next it was time to lay a second cookie over the first.  I slightly squished down the filling a bit when I did this.  The amount of filling sometimes cause the top of the cookie to crack a bit when I pushed down the edges, but the look was not unattractive.
Edges pressed together with back of the tip of a spoon.
Then I sealed the two layers of cookies together using the back of a regular spoon as recommended.  I suppose someone could get very fancy with this, but I just did a serviceable job.  Some of the editions of this recipe recommend using fork tines instead to seal the edges.

Next, bake for 10-12 minutes.  I was anxious to see how they came out.  They were slightly browned at 11 minutes so I used that time.  They looked pretty good on the cooling rack, and when I tried them I was surprised how good they were.  For a recipe I wouldn’t have given a 2nd glance at, they were very tasty and I ate a good number of them over the holiday weekend.

The finished Date-Filled Cookies on the cooling rack.
The cookies are more crispy when they first cool from the oven, then they soften a bit after a while.  I really liked it when they were crispier, but they were still very good softer and there is probably no way to keep the filling from eventually softening the cookie.

They also went over well at work.  I’d definitely make them again.  They were like little mini pies, but the cookies as the container instead of pastry made them even better.

Lessons Learned:

Roll out in smaller batches, or use strips and a wider rolling pin.

Save all the scraps from cutting out cookies to recombine all at once to ensure you don’t get too much flour into the dough rather than trying to reuse the scraps from a roll out of ¼ of the dough over and over.

A slightly heaped teaspoon did not use up the filling, I could have done more.  Interestingly the later versions of this recipe only use 1 and ⅓ cup of dates instead of two, so maybe there is too much filling.

I could probably flatten the filling out a little more to make it more even before layering the 2nd cookie on.

Next time try sealing the cookies together with fork tines.

Wednesday, December 14, 2011

Cookie Throw Down Number 1!

As I made the Lemon Pecan Sandies, I decided to make shortbread again for my vegetarian friends at work (and anyone else who preferred them!)

As I've been making these cookies and varying recipes and techniques, I thought what I would love to do if I had a bakery is put up 2 versions of cookies and let people give their feedback on them on which they thought was best.

Well I don't, and won't have a bakery, but I have a willing audience of software folks at work that are more than ready to sacrifice themselves in trying cookies.

So this weekend I decided to see what the real difference was between using the "Old Fashioned Oats" that I prefer and the "Quick Cooking Oats" that recipes seem to always call for.  Oatmeal Shortbread would be the battleground.

Sadly there is no Oatmeal Shortbread recipe that comes close on allrecipes.com.  All of those were HEAVY on the oatmeal, when the cookie I do just has 1/3 cup with the flour just reduced a little.  I think most late 80s and beyond versions of The Better Homes and Gardens New Cook Book have this as a variation on their Shortbread recipe if you want to find it.

So I whipped up 2 batches of Oatmeal Shortbread and set up my trial at work.

Hands down the preference was for the ones made with Old Fashioned Oats.  The cookie was crunchier, that was preferred, and had a stronger oatmeal taste that give these cookies a fantastic flavor.  As I always say, the Old Fashioned Oats have more "umph!" So I'll be sticking with the Old Fashioned Oats from now on!

Next Throw Down I'll post pictures.

Happy Baking!


Tuesday, December 13, 2011

Lemon Pecan Dainties, Page 120, 2nd Column, 2nd Recipe Down

This week’s recipe that I pulled from my little container of slips was “Lemon Pecan Dainties.”  Again, something I might not have picked out. 

First step was to dig through my 6 versions of the recipe book and see what kind of history this recipe had.  As it turns out, it was only in my 1976 book, and the 1953 book.  The older recipe has shortening instead of butter, but otherwise it was basically the same.  Sadly, I could find no similar recipe on allrecipes.com.

The recipe reminded me of the “Sandies” I’d made earlier, but this time there was the added lemon zest, and lemon juice.  Also the dough was to be formed in a roll, chilled and sliced rather than chilled and shaped by hand.

Now in these older Better Homes and Gardens recipe books, most recipes have the ingredients listed up top then instructions, but some have all the ingredients woven into just a paragraph, so no listing of ingredients.  So you have to read the whole recipe to figure out what all you need, which is annoying.

But this time it was pretty simple.  I just needed the lemon and chopped pecans, everything else was standard stuff off the shelf.

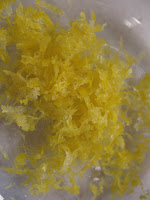
Lemon zest from my microplane!
The cookie started the standard way, cream butter and sugar, then start adding other wet ingredients.  I had fun with my microplane again and got my teaspoon of lemon zest and then a tablespoon of juice and added those to the butter and sugar.  Then combining all the dry ingredients (except the nuts) and mixing that in.  This was another stiff dough and the mixer definitely earned its keep.

The microplane.
Next was to add the 1 cup of finely chopped nuts.  Now these were clearly pretty coarsely chopped, so I knew I needed to chop them up and used my food processor to do it.  But I am uncertain how far down you have to go for it to be considered “finely” chopped.  I suppose there must be some formal cooking definition, but I just got them to about half the size they were from the package and went with that.
Creamed butter and sugar with
lemon juice and zest ready to mix in.


I added the nuts and started up the mixer again and got them thoroughly mixed in.  When I went to scoop the dough from the mixer, I found it to be very clingy.  It stuck to the beater and the sides of the bowl, and my rubber spatula as well.
Dry ingredients added.

Nuts mixed in.

I turned out the dough onto some plastic wrap and started forming a cylinder.  As I squeezed down the size, since it was supposed to be two inches in diameter, the plastic got wrinkly so I ended up  unwrapping the dough and rewrapping it to smooth the surface out as I got it into shape.

Next I put it in the refrigerator to chill thoroughly.

Now once it was cooled, the next step was to slice “very thinly.”  I really wish they’d just give a thickness instead.  So being the mathy geek I am, I measured the length of the roll, and then divided that by the number of cookies it was supposed to make.  Based on that the thickness should be between 1/8 to 3/16 of an inch thick.
Section of chilled dough ready to slice.

Sliced dough, need to work on even slices.
But the dough, although thoroughly chilled, was still a bit on the pliable side.  After cutting enough cookies for one sheet, I put the rest of the roll in the freezer.  Once the dough was completely frozen, slicing went much better.

For the slicing I did have to use a very sharp smooth edged knife (not serrated!) and a sawing motion to cut through the cookie.  Otherwise I think the nuts would have been dragged through the dough.  Even so I had a difficult time maintaining a 1/8” slice.  Somehow ¼” is easy to slice, but 1/8” is more troublesome.  I would keep veering off partway through.

So the cookies were ready for baking, and I used the full 12 minutes after checking them at 10 and still finding them too soft.  I then made the mistake of listening to the recipe when it said to leave the cookies on the sheet for a few moments after coming out of the over.  After a few moments, they didn’t want to come off the sheet.

The finished Lemon Pecan Dainties!
After that I removed them promptly and that worked fine.  The result was a crispy cookie with a gentle lemon flavor and a nice dose of pecans in each.  I took them into work and folks really liked them.  Definitely a very nice cookie, very tasty.

I then pulled next week’s recipe from my container. “Date Filled Cookies”  Definitely something I would never pick on my own.  But I’ve now got 2 packages of dates waiting on the shelf for this one.

Lessons learned:

Label stuff.  I had some extremely finely chopped nuts on the shelf in a Ziploc baggie, but I had no idea what type they were or when I had done them.  I need to label stuff I put on the shelf in baggies in the future.

Freezing worked better for slicing these cookies.

I either need practice, or a better way to get 1/8” slices from a cylinder of cookie dough.

Only taking part of the dough at a time for slicing worked well, that way the dough stayed consistently firm as I grabbed a new piece to work with.


Saturday, December 3, 2011

Lebkuchen, Page 122, 2nd Column, 2nd Recipe Down


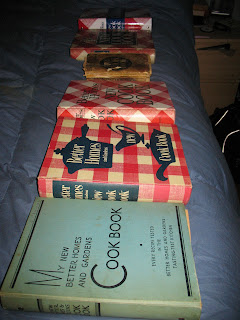
My Better Homes and Gardens Cook Books in order of age.

Because I was having problems picking a recipe, this marks my first week of picking a recipe at random.  Also as part of this cookie experimenting, I now have 6 different copies of the Better Homes and Gardens New Cook Book to cross compare with.  I already had 3 and have added 3 others finding old used copies and getting the latest version.  So now I have ones from 1936, 1953, 1976, 1981, 1989, and 2010. 

First of all Lebkuchen is another traditional German cookie which is also often called “Honey Cakes.”  You can read more here at Wikipedia.  This recipe required me to buy something I’ve never bought before – “chopped, mixed candied fruits and peels.”  I probably would never have picked this recipe out by choice.

Chopped candied fruit and peels.
First I read through the recipe, made sure I had all the needed ingredients and equipment.  This is a rolled cookie that would have to have time to chill as well.  But before I made it I wanted to see how this recipe had changed over time.

The recipe from my 1976 book is identical to this one for German Lebkuchen on allrecipes.com.  Next I went back to my 1953 book, there was no molasses or nutmeg, an additional egg, regular sugar instead of brown and slightly different proportions of ingredients, and only candied lemon and orange peels.  In addition there was no icing applied afterwards as well. 

Main ingredients besides flour, brown sugar, etc.
Next was to see what the 1936 recipe book contained, and this diverged even further.  Even more eggs, a much larger proportion of sugar to flour,  the almonds that were added were to be ground, and the fruit this time was Citron, also called for to be ground.  A friend at work and I puzzled over this a bit, but finally concluded that they must mean the candied peels of Citron ground as in a meat grinder to get smaller pieces.  There was no leavening either, so I’m not sure how cakey this could be, and it was limited to 2 spices rather than the four from the 1976 recipe.  This time it was only cinnamon, but also cardamom which was not in the other recipes.  Also this recipe was a drop cookie rather than rolled which seemed at odds with the history of the cookie.

Looking forward the Lebkuchen recipe appears in my 1981 book and is identical to the 1976 recipe, but then is absent in all future editions I have.  So clearly a cookie that has fallen out of favor it seems.  I had never had it in my life, so I was looking forward to the making, and the tasting to see what it would be like.
The egg, brown sugar, molasses and honey
and my new mixer blade!
First off was to beat the egg, I used my new mixer blade that has built in scrapers along the edges, should be less of a problem having stuff build up on the sides of the mixing bowl for my KitchenAid mixer now.  But they are a little noisy.

Then the sugar and the honey and molasses next.  This produced a syrupy mix, and I realized for the first time, there is no butter or shortening in this recipe.  No wonder they say to grease the cookie sheet!

Before I measured out the dry ingredients I wanted to make sure I had the cut up further the chopped candied fruit and peels and measure out 1/2 cup.  How to do this...these things were a sticky mess, so I though maybe the food processor would do the trick.  Alas, it chopped it up so fine parts of the fruit now looked like beads, and the shredder attachment didn't work out at all.  So I had to resort to chopping it up by hand.

Next was to get all the dry ingredients together.  Anytime a recipe calls for more than 2 cups of flour, I can easily lose track.  When I was making the Springerle I had to remeasure at least twice because I lost count of the 4 cups of flour I was supposed to use.  So I kept careful track and then added in all the spices and the baking soda.  I was ready!

The finished dough, sticky beyond belief!
I slowly mixed in all the dry ingredients, and it was definitely giving my mixer a workout.  Now I could smell all the spices I'd used.  When I lifted the mixer blade out, the dough was extremely sticky.  I scraped as much off the beater blade as I could, then I mixed in the slivered almonds and the minced fruit.  That was quite a chore!  Here is the resulting cookie dough: 

Now the dough had to chill for at least 3 hours, I was hoping that it would firm up reasonably, it seemed too soft for a roll out dough, but I was going to find out.

While the dough chilled I made the icing.  I had just gotten a micro plane to get cirtus zest, so this was my first chance to try it out.  I really should have taken a picture.  It was quite amazing, if you zest any fruits on a regular basis, you'll want this tool.  It produced fine fluffy zest that looked beautiful.  I mixed together the ingredients for the glaze and also put that in the refrigerator.

The dough hand patted down and ready for rolling.
Three hours later and the dough was supposed to be ready.  I put an ample amount of flour on the counter and turn out the dough and patted it together with well floured hands.  Although it was still quite sticky, enough flour and I could work with it.

I rolled it out to about 1/4 inch thick.  I think I definitely want to get some of those add ons for rolling pins that will give you an exact height across all your dough.  I can never get it even.  Once I was done rolling it out, I attempted to cut out the 3.5x2 in rectangles recommended.  This turned out to be harder than expected, but I shouldn't have been surprised.
Ready for cutting cookies!
The slivered almonds and sometimes the fruit impeded the pizza slicer I was using.  It took some vigorous repeat rolling and pressure to cut through some of it.  But that wouldn't be my only problem.  As I'd rolled out the dough, there was not enough flour underneath it in some areas and when I tried to lift the cut rectangles, they were seriously stuck to the counter.  

The cut cookies.
With a little work I eventually got them onto the cookie sheet and started baking.  The smell was amazing.  It took three cookie sheets to hold them all and eventually I got them all baked and on the cooling rack.

Ready for baking!
The house smelled great and I was curious to see how they tasted, but I wanted to let them cool.  Then I remembered - the glaze!!  I quickly got out the lemon glaze which was to be applied while they were still warm and got them coated.  But I need to work on using it evenly, I ran short on the last few cookies.
The baked Lebkuchen.

The finished Lebkuchen!
The resulting cookie has a dense texture, very chewy, and very very strong in flavor, stronger than gingerbread I've had.  The nuts were nice, but I'm still not sure about those candied fruits and peels.  Some of those had a pronounced flavor I can't say I cared for.  We'll see how these go over at work on Monday.  

Ginger Shortbread
To make a treat for my vegetarian friends at work, I tried making ginger shortbread.  A recipe I made up.  Not sure that it's something I would make again, but we'll see how they go over too.

Lessons Learned: 

Cutting up candied fruit and peels is a pain.  Is it really worth it for this recipe?  Maybe try without next time.

Use more flour under the dough when rolling out, and don't forget to put back on the apron when you start rolling out the dough.  I got coated in flour.

Don't forget the icing!


Monday, November 21, 2011

A Digression - Springerle!

For the next cookie recipe I decided to do something a little different. I was heading out to visit my parents in the Midwest in a week and I had gotten the idea to make a cookie I used to see my dad have when we visited his parents called Springerle. A traditional German cookie flavored with anise.

This wasn’t in the Better Homes and Gardens New Cookbook, so I used this one off of allrecipes.com: Springerle I

I had never made these cookies before, but wanted to surprise my dad with them when I came to visit. As it turns out I already had the needed rolling pin for them, I had dragged this thing around for years, but never had used it before. The cookies take 2 days to do, so I planned to roll them out on Saturday and then bake them on Sunday.

The recipe is pretty simple, beating the 4 eggs, then mixing in the sugar and butter. Then the usual flour and baking but makes a stiff dough, so once I had added most of the flour to the mixture of eggs, sugar and butter I turned it out onto the counter to knead the rest of the flour in. What was neat when you added the dry ingredients was the ¼ cup of anise seed that gets incorporated into the mix.

So once I kneaded it all together, adding extra flour as needed, I rolled it out to ½ inch thick and then used the Springerle rolling pin. I definitely need some practice with this, I was very inconsistent with how much pressure I applied, so some of the dough had a good impression, but some did not.

Next was how to cut the cookies out along the design, I realized a pizza cutter would be the perfect solution and I repeated the process several times rolling out the dough, pressing in the design with the carved rolling pin, and then cutting out more cookies. I moved them all to the anise seed covered tea towel.

Next was the easy part, you let them dry for a day.


Springerle cookies drying on a tea towel covered with anise seeds

A day later and I heated the over up to 325 and proceeded to bake the cookies for 15 minutes. I figured this was mainly to dry them out more, but when I checked them after 15 minutes they were puffed up from the bottom, and I was worried I had done something wrong.

Then when I took them out, most of the kind of lost the puffiness, sort of collapsed back to their original size. I assumed this was what was supposed to happen. So I had enough to bring 3 dozen to my dad and bring a few extra to work on Monday.

When I brought them in I sent an e-mail out to explain these cookies. As it turns out I should have read the wikipedia articlel myself before I embarked on making these because it explained a lot, and it let me know what I’d done wrong the first time! You can read about Springerle here on wikipedia.

So the drying of the cookies for a day was to prevent the design from being distorted when they rise, and the puffing up was supposed to happen, and not only that, it should have stayed puffed up so they have a ‘foot.’ So I realized I had to try it again and did so during the week.

This time I baked them 20 minutes instead of the recommended 15 and it did the trick as you can see in this picture. People had liked the original ones I made, but this second batch was superior. I let them dry on the cooling racks the next few days and then packed them into a couple of tins to bring to the midwest.


Springerle cooling after baking
'Foot' at bottom of cookie


Another example of the 'foot'
Lessons learned:

For very traditional cookies it’s worth reading the history to understand better what’s going on with the cookie.

Need to practice getting consistent pressure when rolling out the designs.

These cookies would probably be perfect for cookie stamps. May try that next time!

Friday, November 18, 2011

Caramels, Page 153, 2nd Column, 1st Recipe

At the same time when I was doing the Vanilla Crisps I decided to dive into the Candy chapter of the book.

I used to make a candy from this cookbook regularly when I was in my teens called Divinity, but that was the extent of my candy making and had been more than 30 years ago.  But I had been paging through the Candy chapter and decided I’d like to try out stuff there too.  Caramels appealed, they seemed pretty simple, I like caramels, and had never had homemade ones.

As it turns out allrecipes.com has something very close: Chewy Caramels

So I wrote up my shopping list, I figured since it called for one pound of brown sugar, I’d just buy a fresh box and use that instead of dipping into my usual baking supply.  I also needed light corn syrup and sweetened condensed milk.  The recipe I was using called for a 15 oz. can of that and I dutifully added that to my shopping list.  This would lead to an “Oh, this is what happens when you use a 35 year old recipe book” moment.

At the grocery store everything is going well until I get to the sweetened condensed milk and lo and behold, the containers are only 14 oz!  This being a candy recipe I was not confident about using that one ounce less and bought two cans.  Looking at the slightly different allrecipes.com version, it would probably be fine to use just 14 oz, but I just wasn’t sure at the time.

As it turns out I already had a candy thermometer, but I had to use a larger pan than the 3 quart pan that was recommended.  I melted the butter then added in everything else except the vanilla and started raising the temperature of the mix, stirring constantly with the thermometer clipped to the side of the pan.

This was time consuming, and I fretted about the height of the flames and burning the mixture.  I imagine I’ll get more used to this after trying other candy recipes.  The worst part was with my combination of being nearsighted and farsighted I could not read the thermometer from more than a few inches away.  I had to take off my glasses, lean over the pot and try to read it.  I kept thinking one inopportune splash could be really bad.  I felt like I should be wearing safety glasses.

Finally after what seemed like a very long time and lots of stirring (my hand got tired!) the mixture reached the recommended temperature.  I removed it from the fire, added the vanilla and stirred it in and then poured into the buttered Pyrex pan I had ready.

Now to let it cool.  I salvaged some of the remainder from the pot and gave it a taste, and oh goodness, it tasted great.  Buttery and with a flavor I think of as distinct to caramels (and perhaps attributed to my use of dark brown sugar), very good.  But as it turns out, they didn’t quite turn out as they should have.

Although what was salvaged from the pot firmed up nicely, what I had poured in the Pyrex dish never became as firm.  It was still firm enough to cut into caramels, but it would lose shape after a bit, they were softer than they should have been.  Still delicious, but too soft.  My guess is that the thermometer was not registering the temperature properly.  I had skipped a crucial step, calibrating the thermometer, and I hadn’t done the cold water test either. One of a few lessons learned for the next try.

Lessons Learned:

Calibrate the thermometer and adjust accordingly for any future candy making.

Use the cold water test as a second measure of readiness.

Use the right size pot, I suspect that because the mixture was not that deep in the pot, it was more difficult to keep the thermometer in a position where it wasn’t too close to the bottom.  That would cause it to register as hotter than it was.

Try the recipe with just a 14 oz container of sweetened condensed milk.  It will probably be fine, but it would be nice to do a taste comparison.

Find a way to put something into the pan you pour the caramels to set in to make it easier to get them out later.  Maybe aluminum foil?

Thursday, November 17, 2011

Oatmeal Rounds, Page 120, 2nd Column, 1st Recipe

Looking through the recipes, this one intrigued me, I’ve made regular oatmeal cookies plenty of times, but this one was a bit different.  So I jumped in.

Sadly there is no similar recipe I could find on allrecipes.com.  This one seems to be unique.  I will update if I find one.

When I picked this recipe, I knew that it would require refrigeration which was fine, but the real surprise was in how the cookies came together.

Radically different from previous cookie recipes, this recipe started by putting all the dry ingredients into a bowl and mixing them together.  Next step was to put in some butter and shortening into the bowl and cutting it into the dry mixture until it’s crumbly.  Basically this recipe was starting like a pie crust!

But cutting in the butter and shortening was a real trial.  The shortening was soft because it was off the shelf, and the oats interfered with my pastry blender so I had to resort to using 2 knives like my mom used to do for making pie crusts.  It was slow, tedious business.

As an aside, I always use old-fashioned oats when I make baked goods with oatmeal.  Recipes always call for quick cooking oats, but I feel like the old-fashioned ones have more “umph”.  I like them better.

I had cut in the butter and shortening as much as I was going to, which probably wasn’t as much as it should have been, but I wanted to move on.

Next step was like pie crust yet again.  Just 2 tablespoons of cold water with a teaspoon of vanilla added was to be drizzled over the dry mixture with the butter and shortening cut in and tossed enough to coat.  Neat!

Now the instructions said to form the mixture into a 2” diameter cylinder, so I dumped the bowl out onto some plastic wrap and started pulling it together.  It was hard to imagine this stuff holding together for cookies!  But I managed to create my cylinder and put it in the refrigerator over night.

The next day it was very solid and ready to cut.  Now the instructions said to slice thinly the italics right there in the book.  What the heck does that mean?  I could only imagine it meant around ⅛ of an inch, but who knows?  So I started by cutting the cylinder in half long ways so I had a nice flat edge to start with and then tried to slice off a cookie.

Well it wasn’t holding together at all at ⅛ of an inch, so I went up to ¼ of an inch and that seemed to work for the most part.  Sometimes they were still trying to fall apart, but I’d mush the sliced cookie back together and get it over to the cookie sheet.

It was still difficult to imagine how these cookies were going to turn out.  With no eggs to hold them together I was curious how they’d bake up and come off the sheet.

These went into a slightly cooler oven at 350 and I timed 10 minutes for the 8-10 minutes recommended time.  It wasn’t enough when I touched them they were completely soft. I had to let them go a minute or two longer or they wouldn’t hold together on the spatula.  
Oatmeal Rounds cooling on the rack

With that adjustment I proceeded to make the rest, it was troublesome slicing the cookies, but kind of neat too.

Once one had cooled, I tried it and I found it to be very tasty.  Almost a little butterscotchy in flavor with a really nice chewy texture.  I brought these in to work and they were very popular, definitely one to try again!


Ready to serve!
Lessons Learned:

Have the shortening you’re going to use in the refrigerator or freezer so it’s firm to start with.  It was too soft for cutting in off the shelf.

Try cutting in with all the dry ingredients except the oats, then add the oats.  Cutting in the butter with the oats there was clunky.  I could not use my pastry blender effectively.

Try using quick cooking oats one time.  The old-fashioned oats may be too heavy for cutting these cookies thinly enough.

At ¼ inch slices they needed to cook longer than 10 minutes to be able to hold together.  See if more thoroughly cut in butter/shortening and/or use of quick cooking oats allows thinner slicing and shorter cooking time.

Vanilla Crisps, Page 119, 2nd Column, 1st Recipe

It was time to pick a 3rd cookie and the Vanilla Crisps caught my eye. They looked simple enough.

The closest recipe on allrecipes.com is Vanilla Wafers III, it has a touch less sugar, and added salt.

This cookie recipe was very standard, cream butter/shortening and sugar. (BTW, I always use butter flavored shortening in cookie recipes calling for shortening now.) Add the eggs, vanilla and blend in, then the dry ingredients mixed together.

The next part was the fun part. There were two options, drop by spoonfuls and flatten with the bottom of a floured glass, or chill and form into 1” balls and then flatten. I did the former. But oddly enough the real trick was finding a glass with a flat bottom! I ended up resorting to a Pyrex 1 cup measuring cup.

I squished the cookies fairly flat, around ⅛” inch. The interesting thing to note in this recipe is there is no leavening agent. No baking soda or powder that is present in many cookie recipes. So these cookie don’t puff up much when baked.

I liked the rough edges from using the dropped spoonfuls of dough and then the glass to flatten. I then baked them at my usual 9 minutes in a 375 oven and the result was OK. Sort of like a sugar cookie, but then I made a mistake with the final tray of cookies.

When I put them in I forgot to start the time. When I finally realized what happened I figured I’d lost about 2 minutes. So I put 7 on the timer and did not keep an eye on them. When I pulled them out about the last quarter inch of the outside edge of the cookies was lightly browned. I was dissappointed, I tend to like soft cookies and I knew these would end up crunchy. But there was a surprise in store.

Once the last batch had cooled, I tried one, and to my surprise they tasted better that the lightly cooked ones. I brought these in and got the same response, a little browning at the edges and it was a better cookie. Very tasty! I am going to try these again and let them brown at the edges and be a crispy cookie instead next time.

Lessons Learned:

Try 1” balls chilled then flattened.

Bake longer, they tasted better with a browned edge.